Technical Writings
- C++ Concurrency Book
- Articles and Publications
- Conference Presentations
- Recent Blog Entries
- Multithreading Blog Entries
- C++ Blog Entries
Subscribe to Blog
Blog Archives
Migrating to https
Thursday, 30 October 2014
Having intended to do so for a while, I've finally migrated our main website to https. All existing links should still work, but will redirect to the https version of the page.
Since this whole process was not as simple as I'd have liked it to be, I thought I'd document the process for anyone else who wants to do this. Here's the quick summary:
- Buy an SSL certificate
- Install it on your web server
- Set up your web server to serve https as well as http
- Ensure that any external scripts or embedded images used by the website are retrieved with https
- Redirect the http version to https
Now let's dig in to the details.
1. Buy an SSL certificate
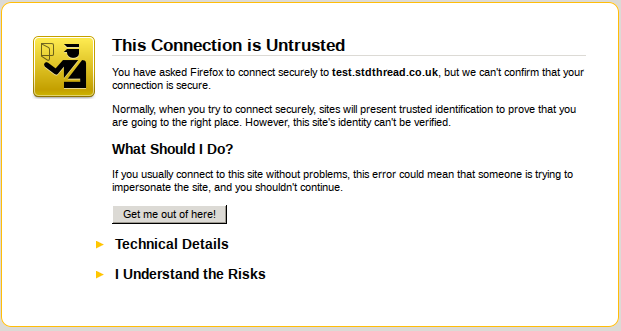
For testing purposes, a self-signed certificate works fine. However, if you want to have people actually use the https version of your website then you will need to get a certificate signed by a recognized certificate authority. If you don't then your visitors will be presented with a certificate warning when they view the site, and will probably go somewhere else instead.
The SSL certificate used on https://www.justsoftwaresolutions.co.uk was purchased from GarrisonHost, but there are plenty of other certificate providers available.
Purchasing a certificate is not merely a matter of entering payment details on a web form. You may well need to provide proof of who you are and/or company registration certificates in order to get the purchase approved. Once that has happened, you will need to get your certificate signed and install it on your web server.
2. Install the SSL certificate on your web server
In order to install the certificate on your web server, it first has to be
signed by the certification authority so that it is tied to your web
server. This requires a Certificate Signing Request (CSR) generated on your web
server. With luck, your certification provider will give you nice instructions.
In most cases, you're probably looking at the openssl req command, something
like:
openssl req -new -newkey rsa:2048 -nodes -out common.csr \
-keyout common.key \
-subj "/C=GB/ST=Your State or County/L=Your City/O=Your Company/OU=Your \
Department/CN=www.yourcompany.com"
This will give you a private key (common.key) and a CSR file
(common.csr). Keep the private key private, since this is what identifies
the web server as your web server, and give the CSR file to your certificate
provider.
Your certificate provider will then give you a certificate file, which is your web server certificate, and possibly a certificate chain file, which provides the signing chain from your certificate back to one of the widely-known root certificate providers. The certificate chain file will be identical for anyone who purchased a certificate signed by the same provider.
You now need to put three files on your web server:
- your private key file,
- your certificate file, and
- the certificate chain file.
Ensure that the permissions on these only allow the user running the web server to access them, especially the private key file.
You now need to set up your web server to use them.
3. Set up your web server to serve https as well as http
I'm only going to cover apache here, since that's what is used for https://www.justsoftwaresolutions.co.uk; if you're using something else then you'll have to check the documentation.
Firstly, you'll need to ensure that mod_ssl is installed and enabled. Run
sudo a2enmod sslon your web server. If it complains that "module ssl does not exist" then follow your platform's documentation to get it installed and try again. On Ubuntu it is part of the basic apache installation.
Now you need a new virtual host file for https. Create one in the
sites-available directory with the following contents:
    <IfModule mod_ssl.c>
    <VirtualHost *:443>
    ServerAdmin webmaster@yourdomain.com
    ServerName yourdomain.com
    ServerAlias www.yourdomain.com

    SSLEngine On
    SSLCertificateFile /path/to/certificate.crt
    SSLCertificateKeyFile /path/to/private.key
    SSLCertificateChainFile /path/to/certificate/chain.txt

    # Handle shutdown in broken browsers
    BrowserMatch "MSIE [2-6]" \
            nokeepalive ssl-unclean-shutdown \
            downgrade-1.0 force-response-1.0
    BrowserMatch "MSIE [17-9]" ssl-unclean-shutdown

    DocumentRoot /path/to/ssl/host/files
    <Directory "/path/to/ssl/host/files">
    # directory-specific apache directives
    </Directory>

    # Pass SSL_* environment variables to scripts
    <FilesMatch "\.(cgi|shtml|phtml|php)$">
            SSLOptions +StdEnvVars
    </FilesMatch>

    </VirtualHost>
    </IfModule>
This is a basic configuration: you'll also want to ensure that any configuration directives you need for your website are present.
You'll also want to edit the config for mod_ssl. Open up
mods-available/ssl.conf from your apache config directory, and find the
SSLCipherSuite, SSLHonorCipherOrder and SSLProtocol directives. Update
them to the following:
    SSLHonorCipherOrder on
    SSLCipherSuite ECDH+AESGCM:DH+AESGCM:ECDH+AES256:DH+AES256:ECDH+AES128:DH+AES:ECDH+3DES:DH+3DES:RSA+AESGCM:RSA+AES:RSA+3DES:!aNULL:!MD5:!DSS
    SSLProtocol all -SSLv2 -SSLv3
    SSLCompression off
This disables the protocols and ciphers that are known to be insecure at the time of writing. If you're reading this much after publication, or wish to be certain, please do a web search for the latest secure cipher lists, or check a resource such as https://wiki.mozilla.org/Security/Server_Side_TLS.
After all these changes, restart the web server:
sudo apache2ctl restartYou should now be able to visit your website with https:// instead of
http:// as the protocol. Obviously, the content will only be the same if
you've set it up to be.
Now the web server is running, you can check the security using an SSL checker like https://sslcheck.globalsign.com, which will test for available cipher suites, and ensure that your web server is not vulnerable to known attacks.
Now you need to ensure that everything works correctly when accessed through https. One of the big issues is embedded images and external scripts.
4. Ensure that https is used for everything on https pages
If you load a web page with https, and that page loads images or scripts using http, your browser won't be happy. At the very least, the nice "padlock" icon that indicates a secure site will not show, but you may get a popup, and the insecure images or scripts may not load at all. None of this leads to a nice visitor experience.
It is therefore imperative that on a web page viewed with https all images and scripts are loaded with https.
The good news is that relative URLs inherit the protocol, so an image URL of "/images/foo.png" will use https on an https web page. The bad news is that on a reasonably sized web site there's probably quite a few images and scripts with full URLs that specify plain http. Not least, because things like blog entries that may be read in a feed reader often need to specify full URLs for embedded images to ensure that they show up correctly in the reader.
If all the images and scripts are on servers you control, then the you can ensure that those servers support https (with this guide), and then switch to https in the URLs for those resources. For servers outside your control, you need to check that https is supported, which can be an issue.
Aside: you could make the URLs use https on https pages and http on http pages by omitting the protocol, so "http://example.com/images/foo.png" would become "//example.com/images/foo.png". However, using https on plain http pages is fine, and it is generally better to use https where possible. It's also more straightforward.
If the images or scripts are on external servers which you do not control, and which do not support https then you can use a proxy wrapper like camo to avoid the "insecure content" warnings. However, this still requires changing the URLs.
For static pages, you can do a simple search and replace, e.g.
sed -i -e 's/src="http:/src="https:/g' *.htmlHowever, if your pages are processed through a tool like MarkDown, or stored in a CMS then you might not have that option. Instead, you'll have to trawl through the links manually, which could well be rather tedious. There are websites that will tell you which items on a given page are insecure, and you can read the warnings in your browser, but you've still got to check each page and edit the URLs manually.
While you're doing this, it's as well to check that everything else works
correctly. I found that a couple of aspects of the blog engine needed adjusting
to work correctly with https due to minor changes in the VirtualHost settings.
When you've finally done that, you're ready to permanently switch to https.
5. Redirect the http version to https
This is by far the easiest part of the whole process. Open the apache config for the plain http virtual host and add one line:
Redirect permanent / https://www.yourdomain.comThis will redirect http://www.yourdomain.com/some/path to
https://www.yourdomain.com/some/path with a permanent (301) redirect. All
existing links to your web site will now redirect to the equivalent page with
https.
When you've done that then you can also enable Strict Transport Security. This ensures that when someone connects to your website then they get a header that says "always use https for this site". This prevents anyone intercepting plain http connections (e.g. on public wifi) and attacking your visitors that way.
You do this by enabling mod_headers, and then updating the https virtual
host. Run the following on your web server:
sudo a2enmod headersand then add the following line to the virtual host file you created above for https:
Header always set Strict-Transport-Security "max-age=63072000; includeSubDomains"Then you will need to restart apache:
sudo apache2ctl restartThis will ensure that any visitor that now visits your website will always use https if they visit again within 2 years from the same computer and browser. Every time they visit, the clock is reset for another 2 years.
You can probably delete much of the remaining settings from this virtual host config, since everything is being redirected, but there is little harm in leaving it there for now.
All done
That's all there is to it. Relatively straightforward, but some parts are more involved than one might like.
Posted by Anthony Williams
[/ general /] permanent link
Tags: https, ssl, http
Stumble It! ![]() | Submit to Reddit
| Submit to Reddit ![]() | Submit to DZone
| Submit to DZone ![]()
If you liked this post, why not subscribe to the RSS feed ![]() or Follow me on Twitter? You can also subscribe to this blog by email using the form on the left.
or Follow me on Twitter? You can also subscribe to this blog by email using the form on the left.
Design and Content Copyright © 2005-2026 Just Software Solutions Ltd. All rights reserved. | Privacy Policy
No Comments